
July 11, 2026 · 9 min read
How to build a poll from scratch (a step-by-step guide)
Build your own PollsLive deck from a blank start - name it, add questions, pick the right question types, choose when results show, and publish or present. Screenshots for every step, no account required.
Templates are the quickest way to start, but sometimes you want your exact questions in your exact order. Building a deck from a blank start in PollsLive takes a few minutes, and you do not need an account to do it. Here is the whole thing, step by step.
Where building starts
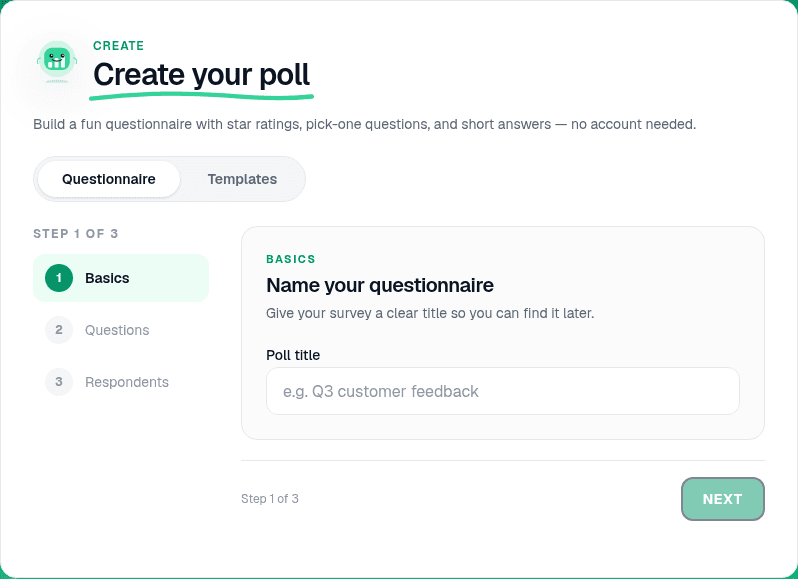
On the home page, the Create your poll panel has two tabs: Questionnaire, where you build your own set of questions, and Templates, where you start from a ready-made deck. This guide takes the Questionnaire route.
Step 1 - Name it and add your questions
First, Basics: give the poll a clear title (something like "Q3 customer feedback") so you can find it again later, then click Next.
On Questions, add each question and pick a type. In this quick builder the choices are Pick one (a multiple-choice question), Star rating (a 1 to 5 scale), and Short answer (open text). Write the prompt, add your answer options, and use Add to build up as many questions as you need. Then set your Respondents options - whether to ask for a name, and whether to collect contact details - and click Create questionnaire.
One thing worth knowing: as soon as your poll has more than one question, PollsLive turns it into a survey automatically - every question on one shareable page, with combined results at the end. That is exactly what you want for feedback forms and multi-question checks.
Step 2 - Refine it in the editor
Now you are in the editor, where the real control lives. Every question is a page in the left-hand list. Add more with Add page, drag to reorder, or remove one you do not need. Select any page to edit it on the right.
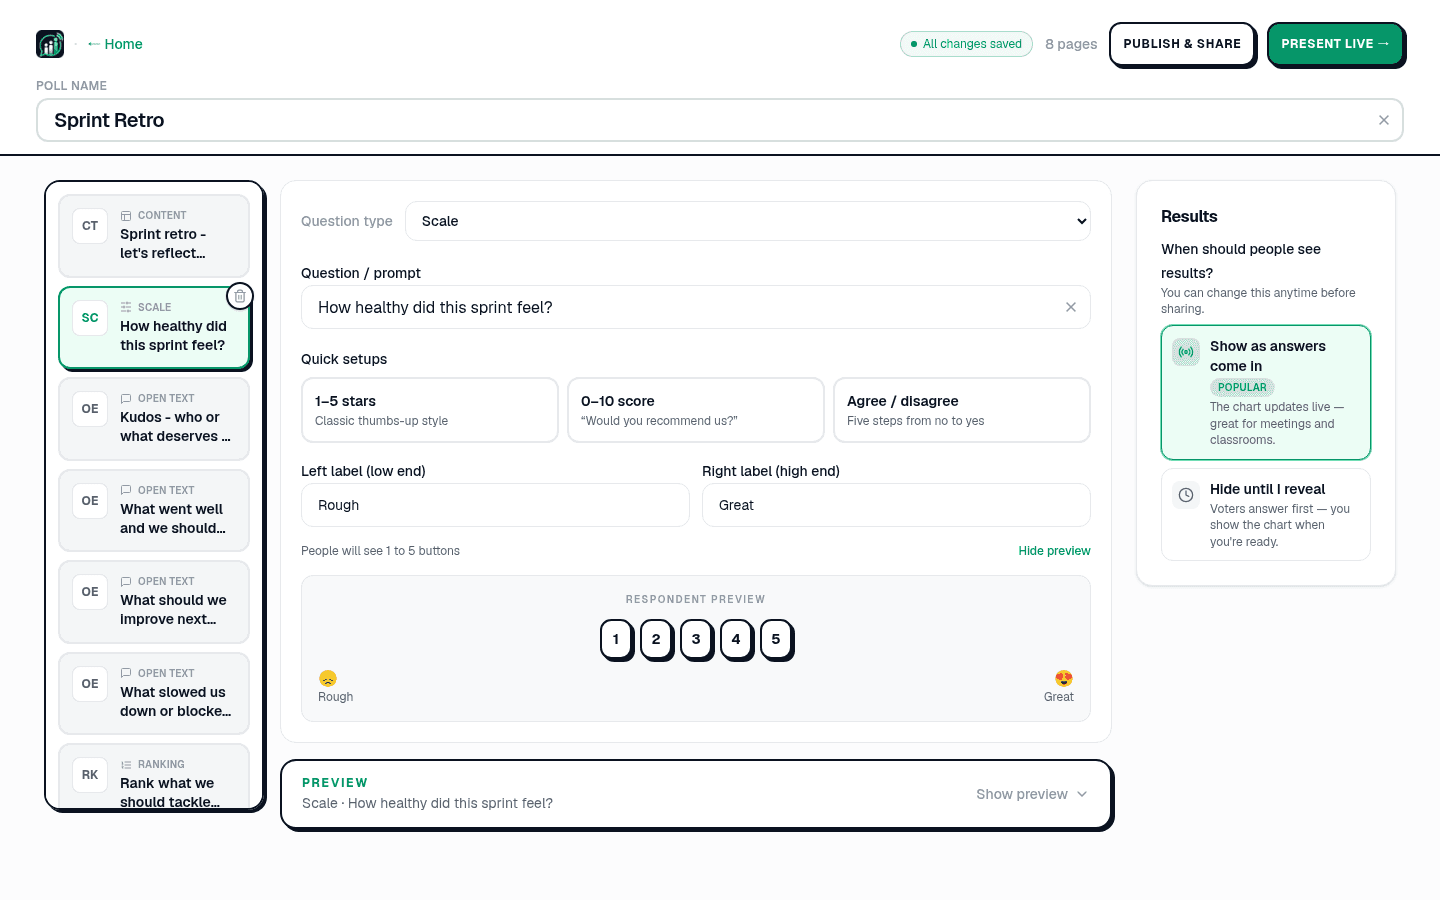
The full Question type menu is broader than the quick builder: Multiple choice (single or multiple answers), Quiz (timed, scored, with a leaderboard), Open text (which can render as a live word cloud), Q&A (audience questions with upvotes), Scale (1 to 5, a 0 to 10 NPS score, or agree/disagree), Ranking (drag options into order), Planning Poker (story-point estimation), and Content (a plain info slide with no answers). Options auto-colour, you can add up to 20 per question, and quiz pages let you mark the correct answer and set a time limit. There is no Save button - the header shows All changes saved a second after you stop typing.
Step 3 - Decide when people see results
On the right, under When should people see results?, you have two choices. Show as answers come in updates the chart live - great for meetings and classrooms where the reveal is part of the moment. Hide until I reveal keeps results hidden until you choose to show them - better when you do not want early answers to anchor the room.
Step 4 - Publish or present
Two ways to get your poll in front of people. Publish & share creates a permanent page at pollslive.com/p/your-poll with its own link and QR code - ideal for a survey you send round by email or WhatsApp. Present live starts a real-time session with a join PIN and QR on screen - ideal for a room in front of you.
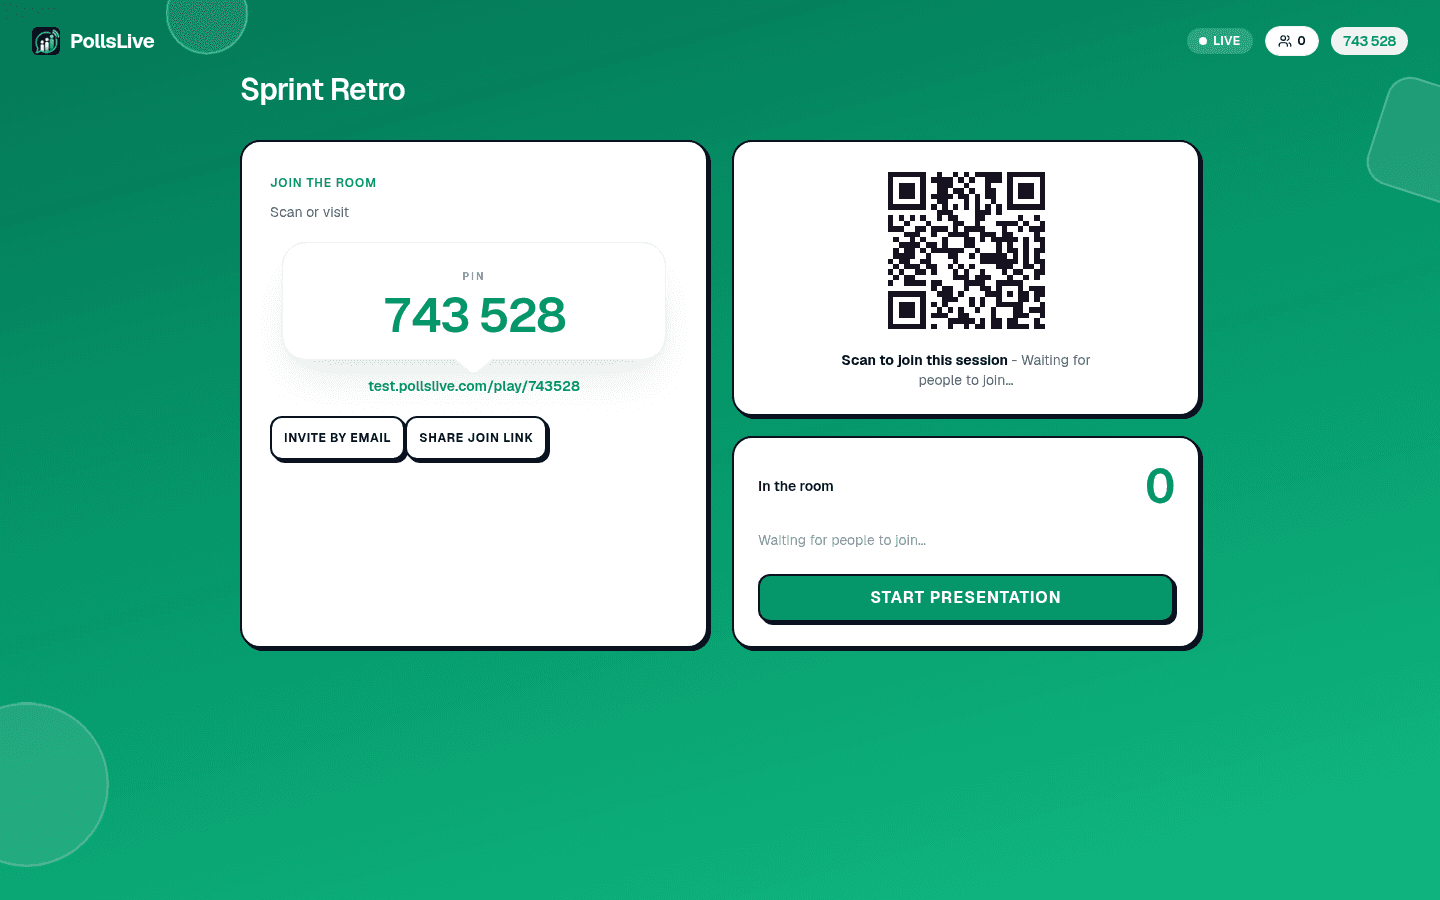
Either way, once answers start coming in you see them the way you set up - here is a multiple-choice question collecting votes in real time:
Which topic should we cover first next quarter?
That is a full poll built from nothing. Want a head start next time? Browse the template gallery - you can start from a ready-made deck and edit it exactly like this. To go deeper on any question type, see the question types reference.
Spin up a live poll right now - no signup, no app for your audience.
Create a free poll